Building a Twitter Bot with Node.js
· Updated
Originally written in IndonesianRead the original (Bahasa Indonesia) →
Note (2026): this article was written in 2020. Since then Twitter has been renamed X and its API has changed quite a lot (including access rules and pricing), so the code below most likely won’t work as-is. The bot account mentioned here may also no longer be active. The concepts and the overall approach are still useful as a reference.
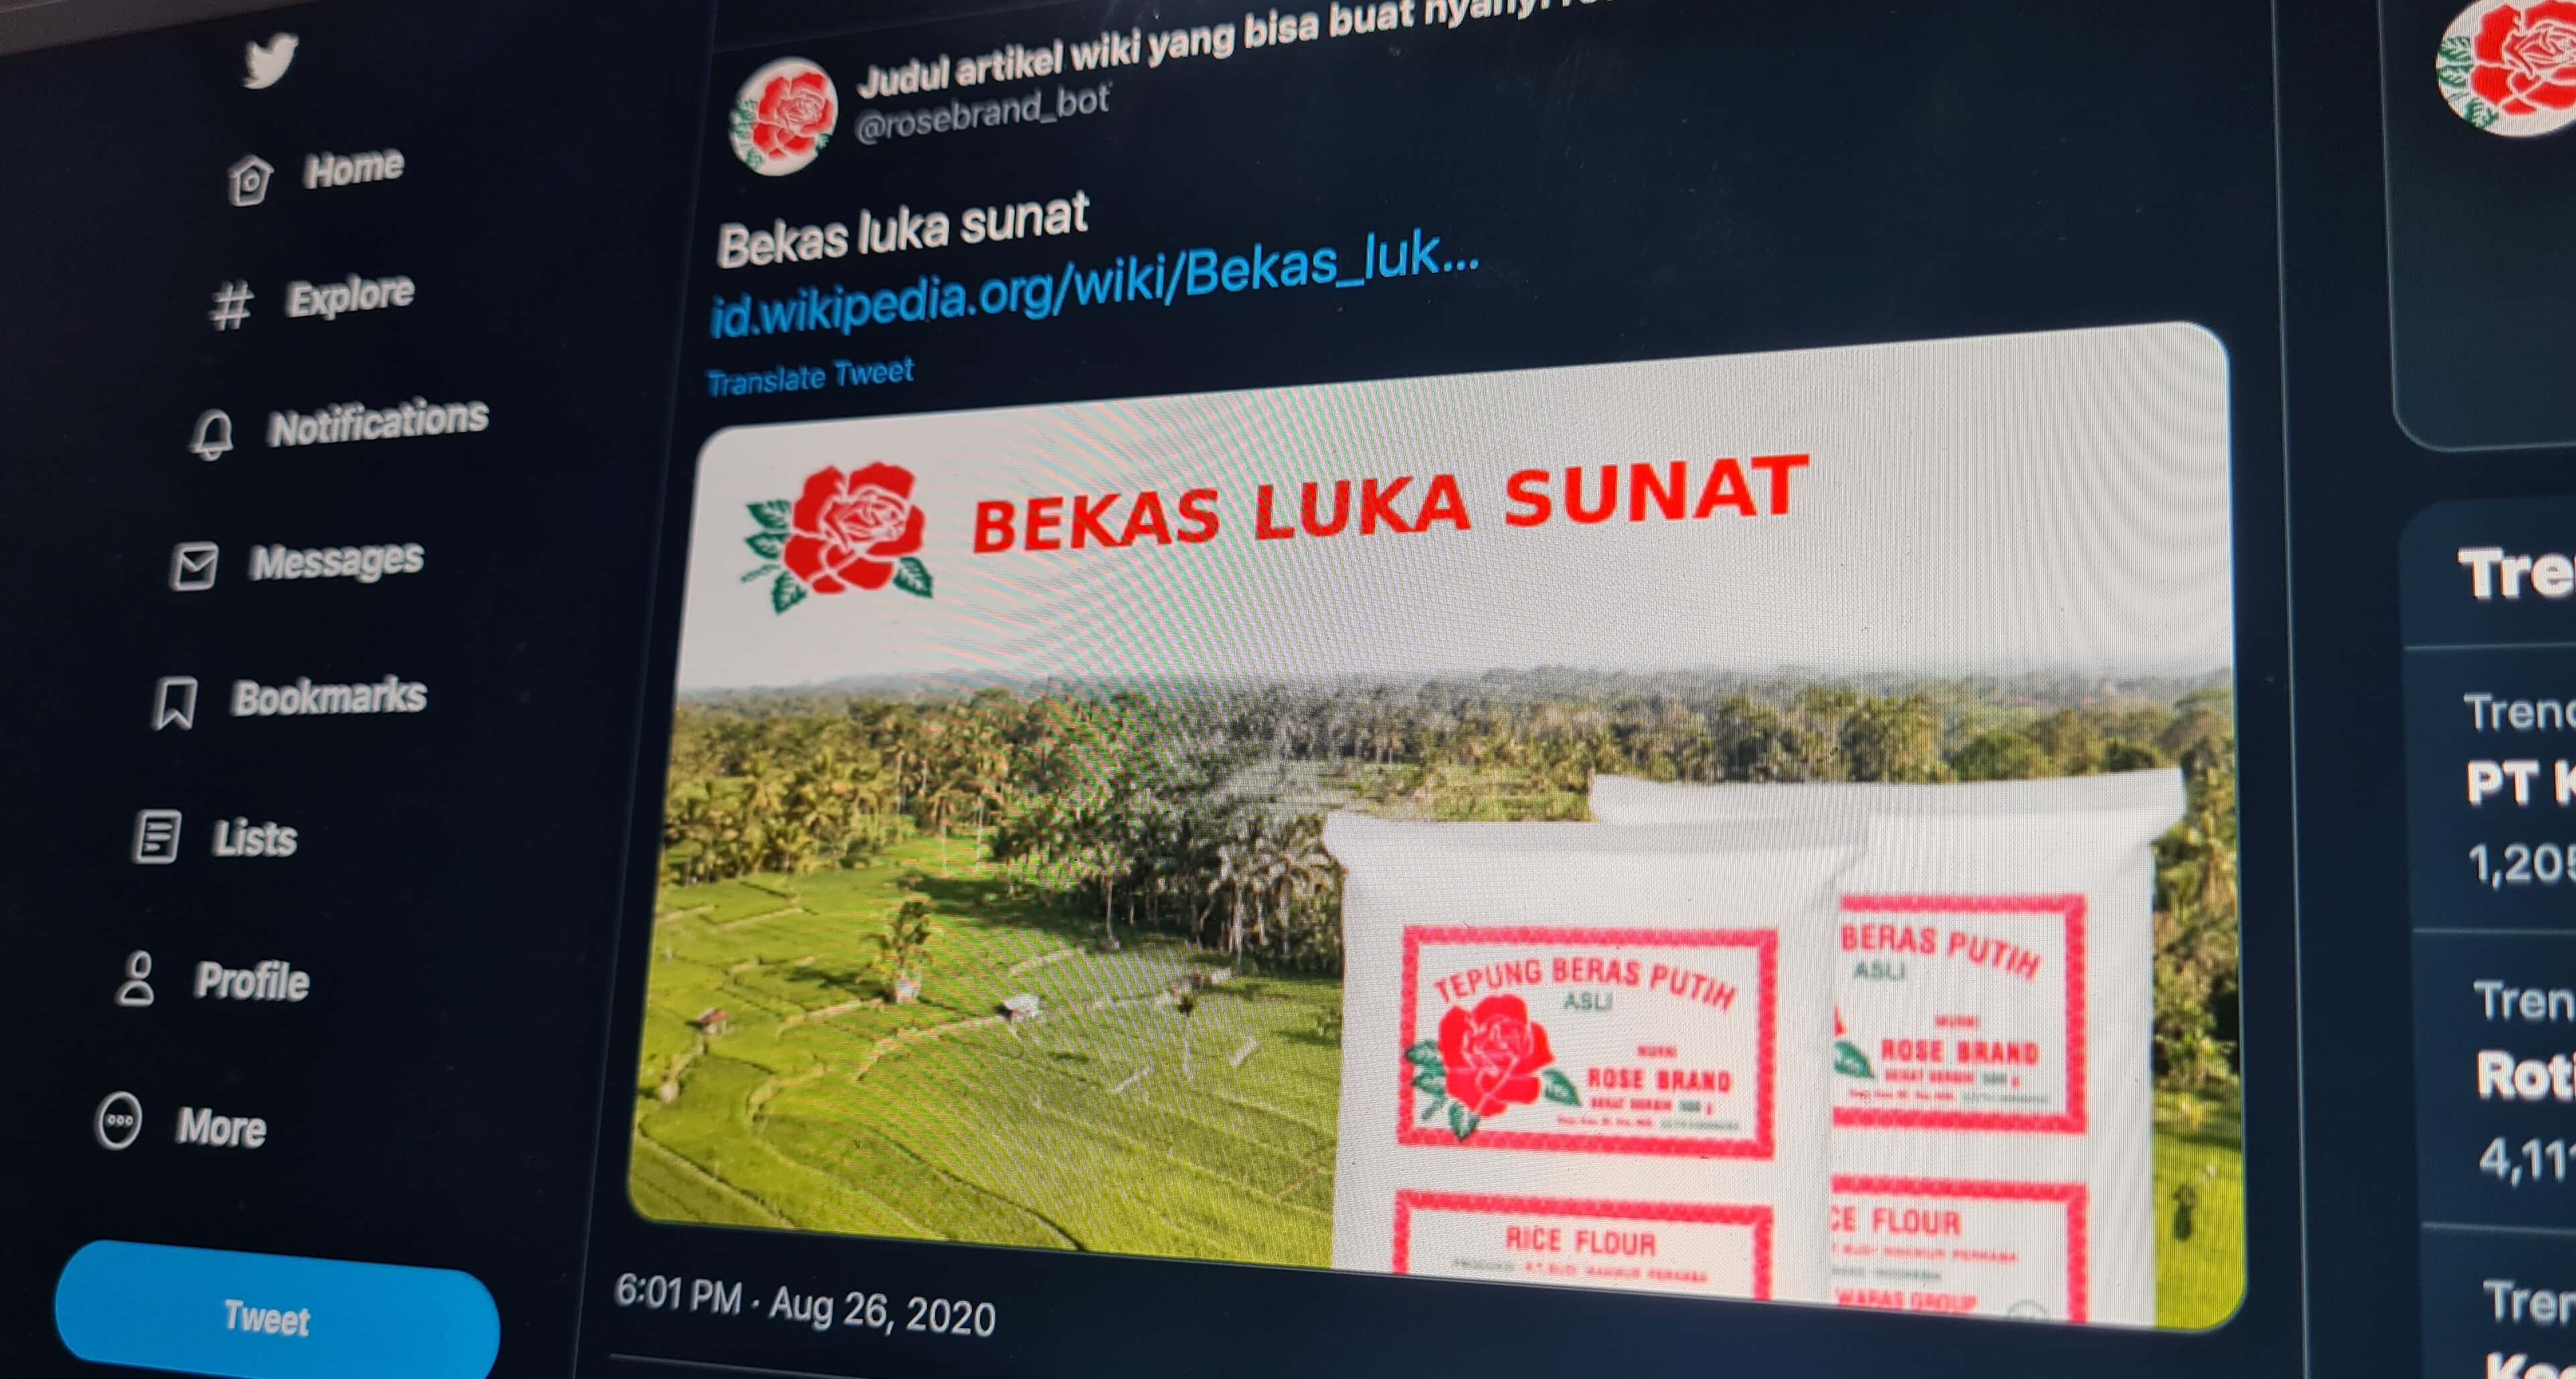
This time I’ll walk through building a bot that tweets Wikipedia article titles that can be sung to the tune of the Rosebrand rice flour jingle. (Rosebrand is an Indonesian rice flour brand, and its TV ad jingle is well known there.)
The Idea
The idea started with the realization that I’m sometimes a bit spoiled by working purely on the front-end side, and on a codebase that already exists at that. That made me want to build something from scratch again. I also sometimes enjoy the tweets of this account, so I was inspired to make something similar.
Since the data comes from Wikipedia article titles, the first thing we need is to get those titles.
Fetching Wikipedia Article Titles
To get Wikipedia article titles, I used a library called WikiJs.
const wiki = require("wikijs");

async function findMatchedTitle() {
  return wiki({ apiUrl: "https://id.wikipedia.org/w/api.php" })
    .random(10)
    ...
}
First we define that our data source is the Indonesian-language Wikipedia. Here I fetch 10 random articles. For these titles we’ll then count the syllables, so they fit the Rosebrand jingle. As soon as a title meets the requirement it’s picked right away, and any remaining titles that haven’t been counted yet are ignored. If none of the 10 titles fit, we start over by fetching another 10 random Wikipedia titles.
Counting Syllables
Before we start counting syllables, we need to set a limit on which titles we’ll process. We won’t process titles that contain numbers.
Why avoid titles with numbers?
Because a number in a title can be pronounced in many different ways depending on the context. For example, the number 108 could be read as “seratus delapan”, “satu nol delapan”, “satu kosong lapan”, “sepuluh delapan”, and so on. Hence this limit, for the sake of consistency and to reduce mismatched counts.
Telling Vowels and Consonants Apart
To start on the syllable-counting logic, we also need a way to tell vowels from consonants. Surely this can be done with a regular expression (regex).
const vocal = ["a", "i", "u", "e", "o"];
function isVocal(char) {
  return vocal.includes(char.toLowerCase());
}
Pretty simple, right?
Oh no, it turns out reality isn’t that easy.
Sometimes an article title contains vowels with diacritics. What are diacritics? I’m sure many people know them but don’t know that they’re called diacritics (I only learned the name while working on this).
A diacritic is an additional mark on a letter that changes how the letter is read. A few examples: à, é, ö, ê, and many more.
Since letters with diacritics aren’t covered by our regex rule, they aren’t treated as vowels. With so many combinations of letters and diacritics, it would be a pain to list every combination in the vowel regex.
Luckily I found a way to “clean” the article title of diacritics and turn them into plain vowels:
let word = "Crème brûlée";
word.normalize("NFD").replace(/[̀-ͯ]/g, "");
console.log(word); // Creme brulee
The Syllable-Counting Logic
To a computer, an article title is just a sequence of characters. Our code can’t count syllables unless we define how a syllable is formed. So what’s the logic that turns a group of characters into a syllable?
When a group of characters has a vowel followed by a consonant
With this rule, we build up a syllable from letters taken one at a time. After taking the first letter, we check the next letter and compare it with the last letter we have.
If the last letter we have is a vowel and the next letter is also a vowel, that doesn’t count as the end of a syllable yet, and we move on to the next letter.
If the last letter we have is a vowel and the next letter is a consonant, this is considered the end of a syllable. We add 1 to our syllable total and continue counting a new syllable from the next letter. This repeats until we run out of letters, until the count clearly exceeds our target, or until the count reaches the target.
Take the word jerapah (giraffe). By the proper rules of the language, its syllables are je-ra-pah. With this rule, though, it gets split as jer-ap-ah, which is still 3 syllables. Not perfect, but close to the real thing.
When we run into a non-alphabet character
Non-alphabet characters here don’t include numbers, since we’ve already excluded titles that contain numbers. The characters we might run into are spaces, periods, commas, hyphens, and other punctuation. So if we haven’t hit a consonant yet but find one of these characters, it means we’ve reached the end of a syllable.
When there’s an “aa”
Indonesian has the suffix “-an”, which is usually pronounced as a syllable of its own.
If we followed the first rule, where a syllable only counts once we hit a consonant or punctuation, the count would get messed up like this:
- Perasaan: per - as - aan (3 syllables)
- Bersamaan: ber - sa - maan (3 syllables)
So I added a special rule (you could also call it a hack): when two “a” letters appear next to each other, they count as 2 syllables.
Combining all of these syllable rules, we get the following code:
const TARGET_SYLLABLE = 6;
function isMatchTargetSyllable(word) {
  if (numRegex.test(word)) {
    return false;
  }

  // remove diacritics
  word.normalize("NFD").replace(/[̀-ͯ]/g, "");

  const wordLength = word.length;
  let syllableCount = 0;
  let syllable = "";

  for (let i = 0; i < wordLength; i++) {
    // if we're already over the target syllable count, skip this title
    if (syllableCount > TARGET_SYLLABLE) {
      return false;
    }

    // if the syllable being counted is empty, fill it and continue
    if (syllable.length < 1) {
      syllable = word[i];
      continue;
    }

    const lastCharSyllable = syllable[syllable.length - 1];
    // if we find a non-alphabet character, reset the syllable and add 1 to the count
    if (!isAlphabet(word[i])) {
      if (isVocal(lastCharSyllable)) {
        syllableCount += 1;
      }
      syllable = "";
      continue;
    }

    if (!isVocal(lastCharSyllable) && !isVocal(word[i])) {
      syllable += word[i];
    } else if (!isVocal(lastCharSyllable) && isVocal(word[i])) {
      syllable += word[i];
    } else if (lastCharSyllable === "a" && word[i] === "a") {
      syllable = "";
      syllableCount += 2;
    } else {
      syllable = "";
      syllableCount += 1;
    }
  }
Once we’ve found an article title with the right syllable count, don’t forget to also grab the article’s Wikipedia link, to prove that the article is real and not made up.
Creating the Image
A tweet will surely get more attention if it has an image. This image is made to look like a real Rosebrand ad and includes the article title we just found.
First, prepare the base image. The rice field picture comes from Unsplash, combined with an image of Rosebrand rice flour.

To draw text onto the base image above, we’ll use the node-canvas library, whose API is similar to the Canvas API.
const fs = require("fs");
const { createCanvas, loadImage } = require("canvas");

module.exports = async function generateImage(text) {
  const canvas = createCanvas(500, 275);
  const context = canvas.getContext("2d");

  // draw the rice field as the base ("sawah" means rice field)
  const sawah = await loadImage("./sawah.png");
  context.drawImage(sawah, 0, 0, 500, 275);

  // add the rosebrand logo
  const logo = await loadImage("./rosebrand.png");
  context.drawImage(logo, 20, 10, 80, 60);

  // write the article title
  context.font = "bold 25px Arial";
  context.fillStyle = "red";
  context.textAlign = "left";
  context.fillText(text.toUpperCase(), 110, 50);

  // save the image
  const buffer = canvas.toBuffer("image/png");
  fs.writeFileSync("./twit.png", buffer);
};
With both the title and the image ready, it’s time to send them as a tweet using the Twitter API.
Twitter API
The Twitter API lets us access Twitter’s features from our own code, whether to send tweets, analyze data, or anything else.
Getting Ready to Use the Twitter API
To access the Twitter API, first log in to developer.twitter.com with the bot account, not a personal account.
After logging in, create a new app and make sure to get these 4 things:
- API Key
- API Secret
- Access Token
- Access Secret
These four are needed as authentication to access the Twitter API and do things that can be done on Twitter as that user. Keep in mind that the Access Token and Access Secret can only be viewed once, when they’re generated, so write them down somewhere else.
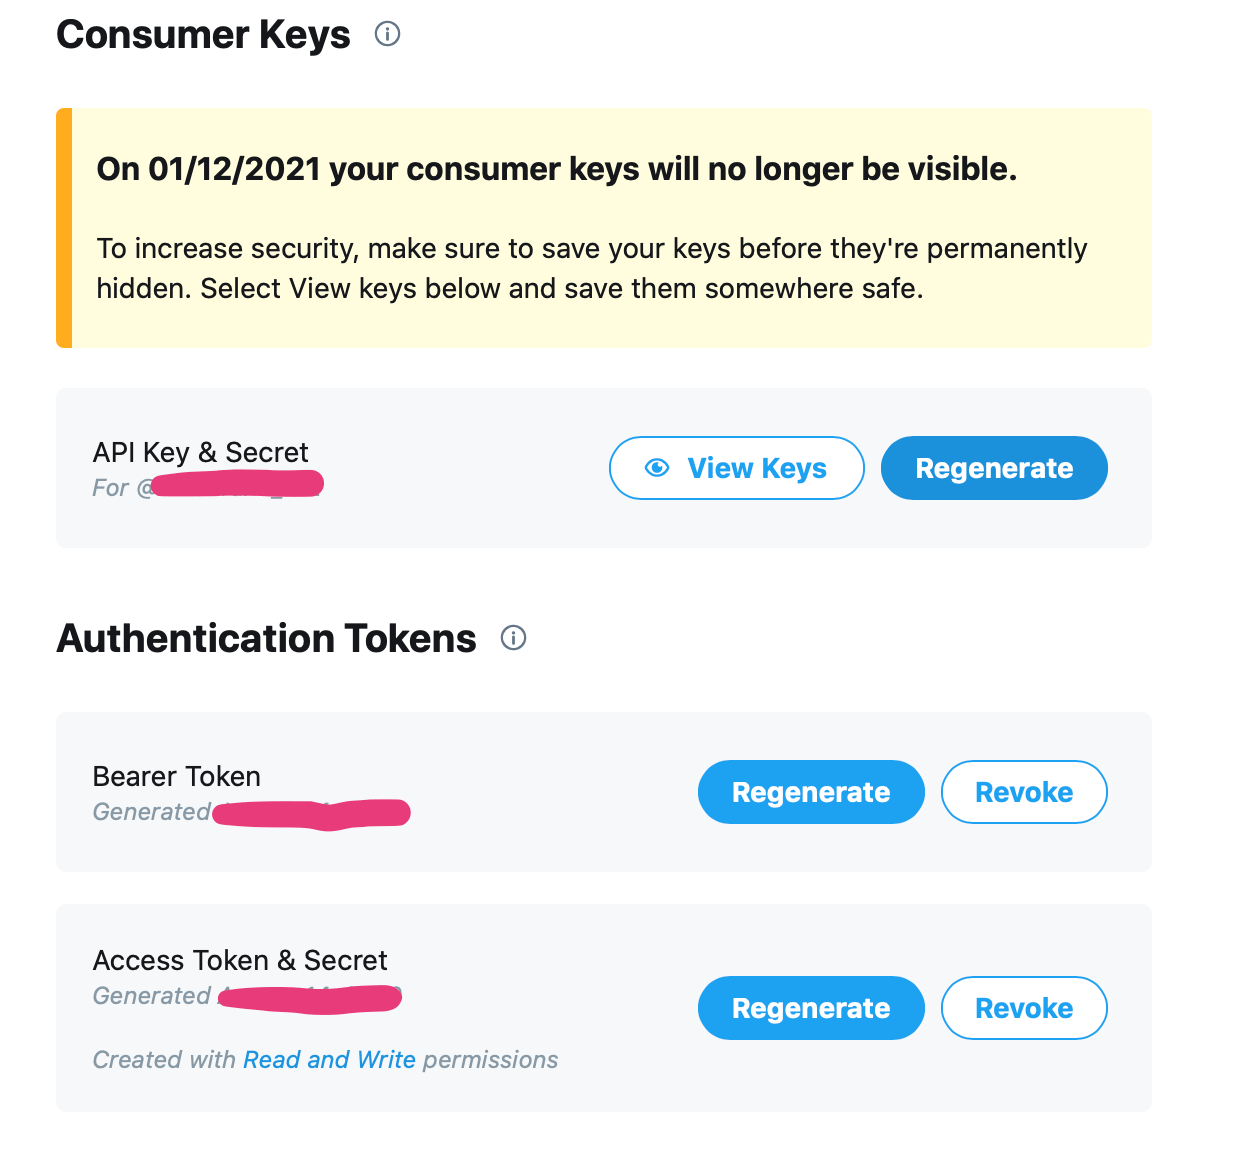
To make calling the Twitter API easier, we’ll use a library called twitter-lite.
Sending a Tweet with the API
Since the tweet we’ll send contains an image, we first need to upload the image before sending the tweet. After the image is uploaded to the Twitter API, we get back a field called media_id. We then include this media_id field and its value in the payload of the API call that sends the tweet.
As a side note, the Twitter API also has several different subdomains.
For example,
- The endpoint for uploading images is https://upload.twitter.com/media/upload
- The endpoint for sending tweets is https://api.twitter.com/statuses/update
As you can see, the API origin for uploading images is upload.twitter.com and for sending tweets it’s api.twitter.com. According to the twitter-lite docs, this difference in subdomain needs to be defined when creating the client instance used to call the API.
const Twitter = require("twitter-lite");

// set the subdomain to upload to call upload.twitter.com
const uploadClient = new Twitter({
  subdomain: "upload",
  consumer_key: process.env.CONSUMER_KEY,
  consumer_secret: process.env.CONSUMER_SECRET,
  access_token_key: process.env.ACCESS_TOKEN_KEY,
  access_token_secret: process.env.ACCESS_TOKEN_SECRET,
});

// the subdomain defaults to api.twitter.com
const client = new Twitter({
  consumer_key: process.env.CONSUMER_KEY,
  consumer_secret: process.env.CONSUMER_SECRET,
  access_token_key: process.env.ACCESS_TOKEN_KEY,
  access_token_secret: process.env.ACCESS_TOKEN_SECRET,
});

const image = fs.readFileSync("./twit.png", "base64");
try {
  const uploadResult = await uploadClient.post("media/upload", {
    media_data: image,
  });

  const tweet = text + "\n" + articleUrl;

  await client.post("statuses/update", {
    status: tweet,
    media_ids: uploadResult.media_id_string,
  });
} catch (error) {
  console.log("err", error);
}
Once that’s done, the code needs to be hosted and given a scheduler so it can send tweets at certain times.
I hosted the bot on Heroku. No special reason other than that it was free and I still felt intimidated by Amazon Web Services, especially for a silly project like this. Luckily Heroku also has a free built-in scheduler, so I didn’t have to build one myself.
The Bot’s Shortcomings
Since this is a silly bot built in a short time, of course it still has shortcomings.
The most obvious one is that it’s inaccurate at counting syllables, so sometimes a title doesn’t quite fit the jingle when sung. This is because titles in foreign languages still get picked up even though the source is the Indonesian Wikipedia. These are usually scientific names, people’s names, or titles of songs, films, or books.
The inaccuracy comes from the different syllable-counting rules of other languages:
- Vowels in Indonesian are only “a”, “i”, “u”, “e”, “o”. In English, for instance, the letter “y” can act as either a vowel or a consonant.
- Different pronunciation. Take the word “horse”: in English it’s correctly pronounced “hors”, which counts as 1 syllable, while with my logic it becomes “hor-se”, which counts as 2 syllables.